You’ll need Node.js 18 or higher. Familiarity
with MCP tools and
resources is recommended since MCP
Apps combine both primitives. Experience with the
MCP TypeScript SDK
will help you better understand the server-side patterns.
The fastest way to create an MCP App is using an AI coding agent with the MCP
Apps skill. If you prefer to set up a project manually, skip to
Manual setup.
AI coding agents with Skills support can scaffold a complete MCP App project for
you. Skills are folders of instructions and resources that your agent loads when
relevant. They teach the AI how to perform specialized tasks like creating MCP
Apps.The create-mcp-app skill includes architecture guidance, best practices, and
working examples that the agent uses to generate your project.
1
Install the skill
If you are using Claude Code, you can install the skill directly with:
To verify the skill is installed, ask your agent “What skills do you have access to?” — you should see create-mcp-app as one of the available skills.
2
Create your app
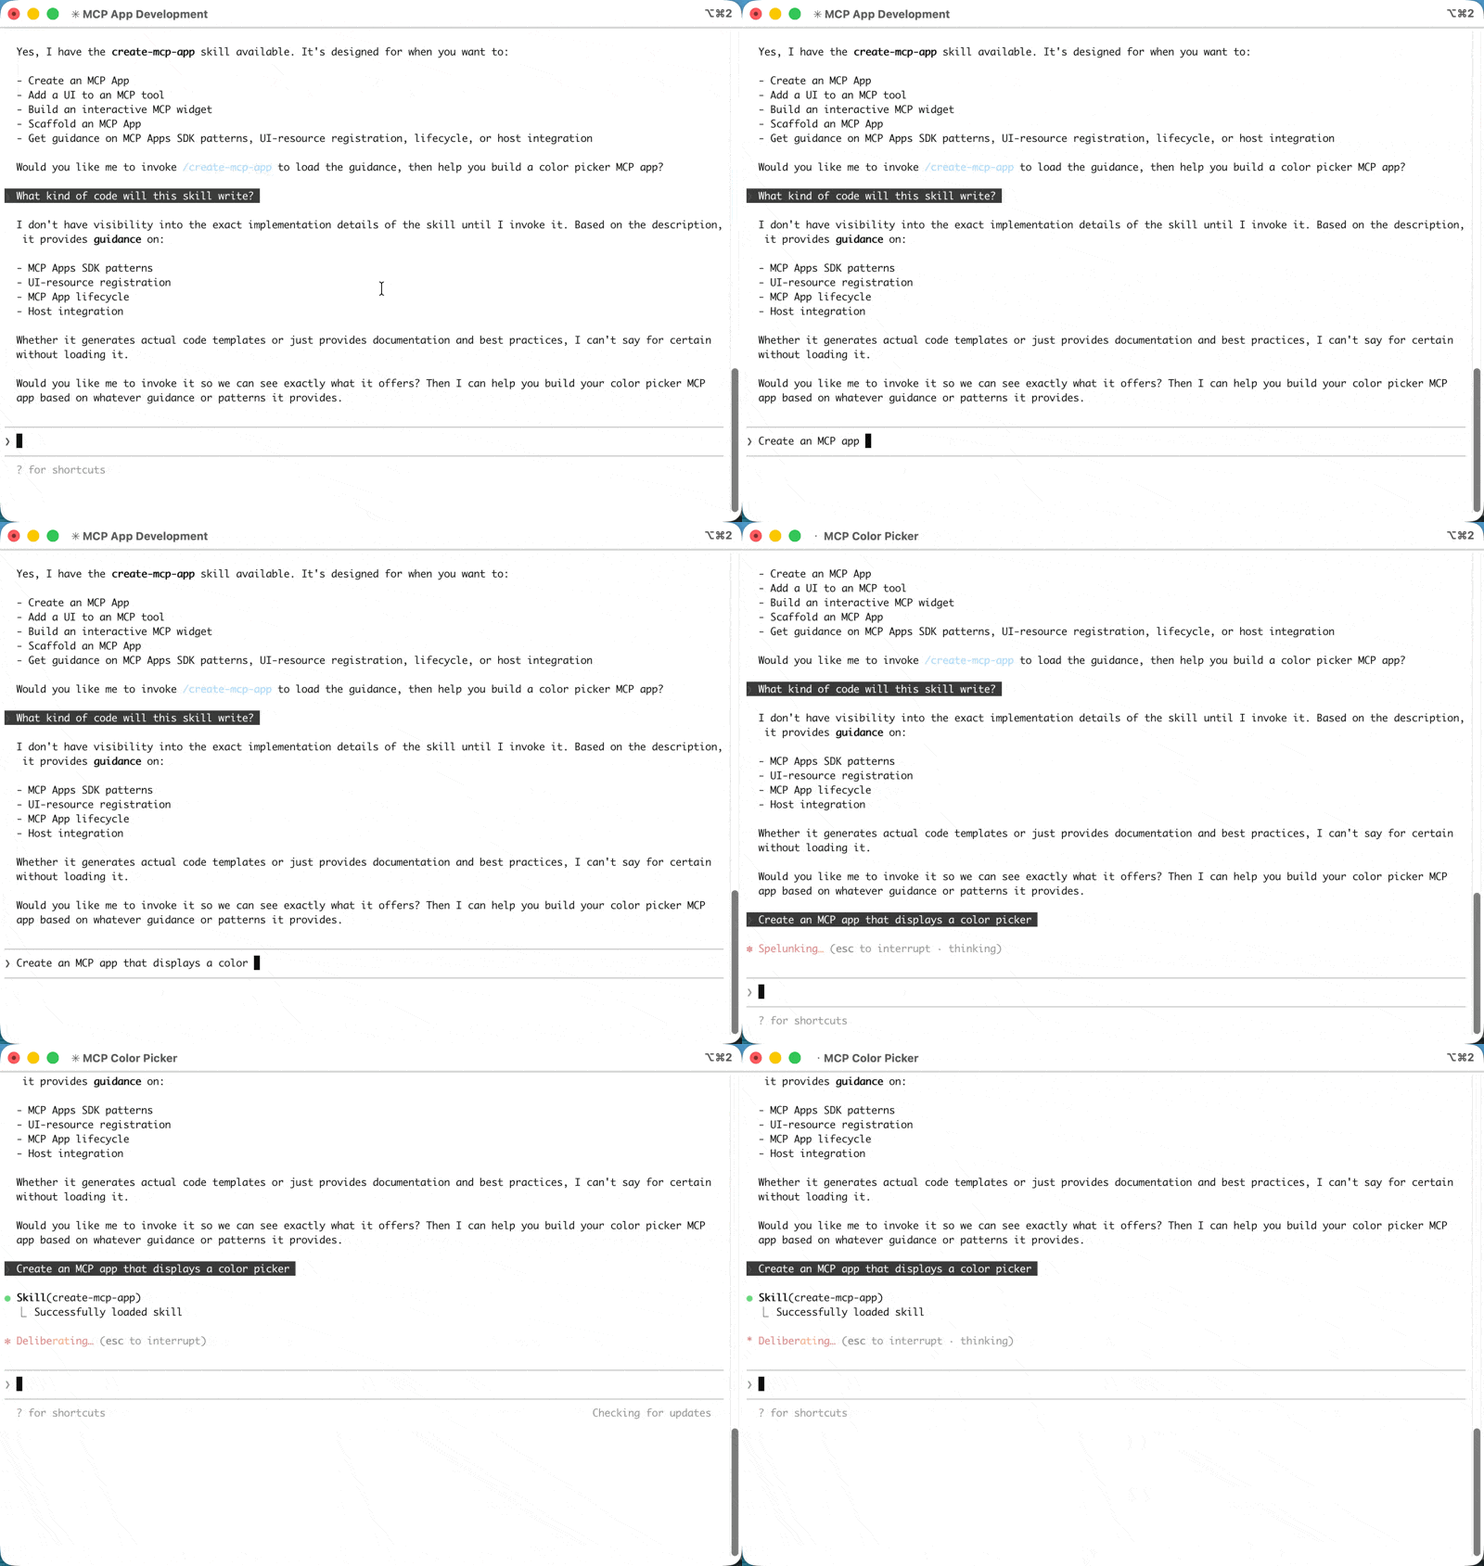
Ask your AI coding agent to build it:
Create an MCP App that displays a color picker
The agent will recognize the create-mcp-app skill is relevant, load its instructions, then scaffold a complete project with server, UI, and configuration files.
Creating a new MCP App with Claude Code
3
Run your app
npm install && npm run build && npm run serve
npm install; npm run build; npm run serve
You might need to make sure that you are first in the app folder before running the commands above.
4
Test your app
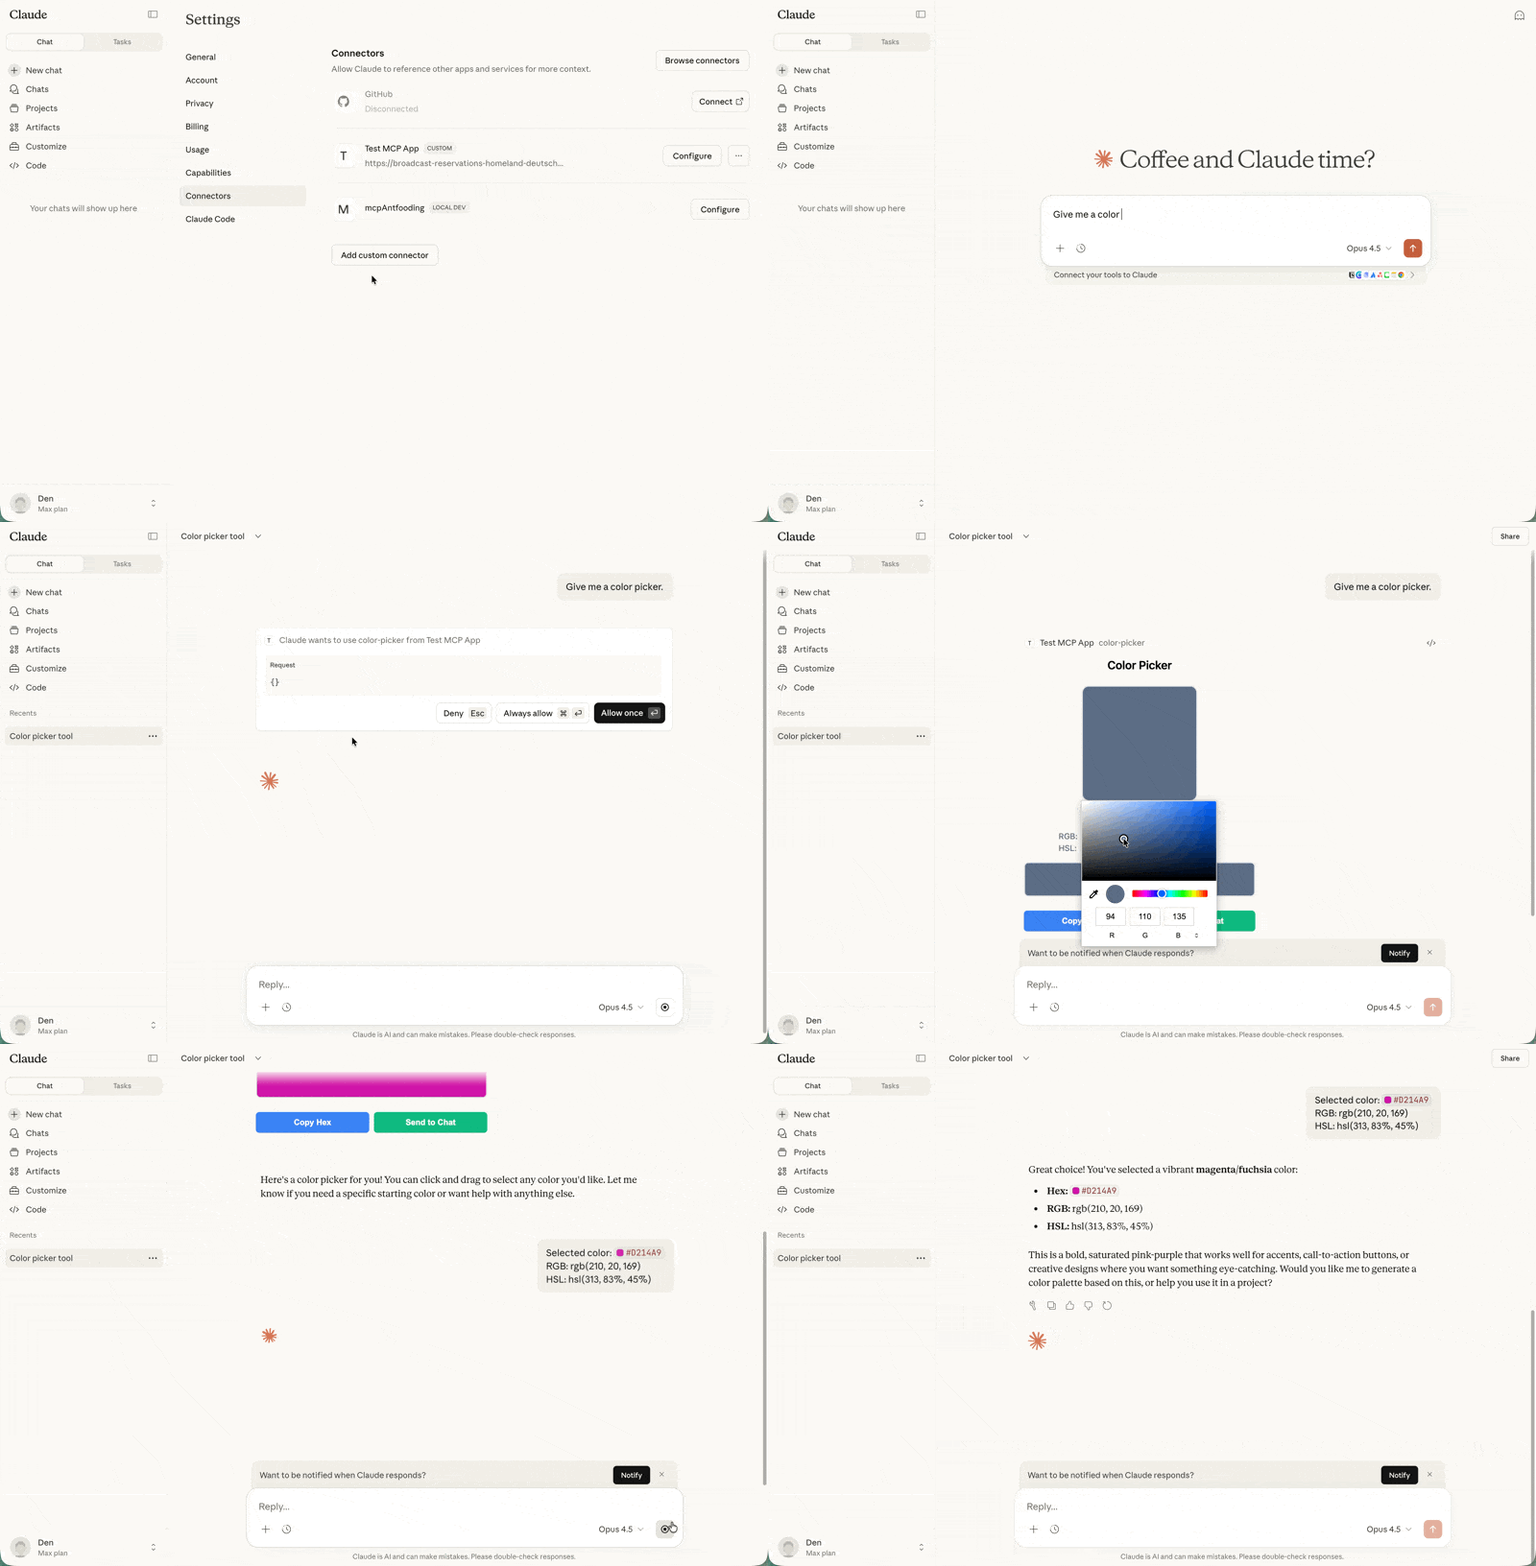
Follow the instructions in Testing your app below. For the color picker example, start a new chat and ask Claude to provide you a color picker.
If you’re not using an AI coding agent, or prefer to understand the setup
process, follow these steps.
1
Create the project structure
A typical MCP App project separates the server code from the UI code:
my-mcp-app
package.json
tsconfig.json
vite.config.ts
server.ts
mcp-app.html
src
mcp-app.ts
The server registers the tool and serves the UI resource. The UI resource will eventually be rendered in a secure iframe with deny-by-default CSP configuration. If your app has CSS and JS assets, you will need to configure CSP, or you can bundle your assets into the HTML with a tool like vite-plugin-singlefile, which is what we will do in this tutorial.
2
Install dependencies
npm install @modelcontextprotocol/ext-apps @modelcontextprotocol/sdknpm install -D typescript vite vite-plugin-singlefile express cors @types/express @types/cors tsx
The ext-apps package provides helpers for both the server side (registering tools and resources) and the client side (the App class for UI-to-host communication). Vite with the vite-plugin-singlefile plugin is used here to bundle your UI and assets into a single HTML file for convenience, but this is optional — you can use any bundler or serve unbundled files if you configure CSP.
3
Configure the project
package.json
tsconfig.json
vite.config.ts
The "type": "module" setting enables ES module syntax. The build script uses the INPUT environment variable to tell Vite which HTML file to bundle. The serve script runs your server using tsx for TypeScript execution.
The TypeScript configuration targets modern JavaScript (ES2022) and uses ESNext modules with bundler resolution, which works well with Vite. The include array covers both the server code in the root and UI code in src/.
Let’s build a simple app that displays the current server time. This example
demonstrates the full pattern: registering a tool with UI metadata, serving the
bundled HTML as a resource, and building a UI that communicates with the server.
The server needs to do two things: register a tool that includes the
_meta.ui.resourceUri field, and register a resource handler that serves the
bundled HTML. Here’s the complete server file:
// server.tsconsole.log("Starting MCP App server...");import { McpServer } from "@modelcontextprotocol/sdk/server/mcp.js";import { StreamableHTTPServerTransport } from "@modelcontextprotocol/sdk/server/streamableHttp.js";import { registerAppTool, registerAppResource, RESOURCE_MIME_TYPE,} from "@modelcontextprotocol/ext-apps/server";import cors from "cors";import express from "express";import fs from "node:fs/promises";import path from "node:path";const server = new McpServer({ name: "My MCP App Server", version: "1.0.0",});// The ui:// scheme tells hosts this is an MCP App resource.// The path structure is arbitrary; organize it however makes sense for your app.const resourceUri = "ui://get-time/mcp-app.html";// Register the tool that returns the current timeregisterAppTool( server, "get-time", { title: "Get Time", description: "Returns the current server time.", inputSchema: {}, _meta: { ui: { resourceUri } }, }, async () => { const time = new Date().toISOString(); return { content: [{ type: "text", text: time }], }; },);// Register the resource that serves the bundled HTMLregisterAppResource( server, resourceUri, resourceUri, { mimeType: RESOURCE_MIME_TYPE }, async () => { const html = await fs.readFile( path.join(import.meta.dirname, "dist", "mcp-app.html"), "utf-8", ); return { contents: [ { uri: resourceUri, mimeType: RESOURCE_MIME_TYPE, text: html }, ], }; },);// Expose the MCP server over HTTPconst expressApp = express();expressApp.use(cors());expressApp.use(express.json());expressApp.post("/mcp", async (req, res) => { const transport = new StreamableHTTPServerTransport({ sessionIdGenerator: undefined, enableJsonResponse: true, }); res.on("close", () => transport.close()); await server.connect(transport); await transport.handleRequest(req, res, req.body);});expressApp.listen(3001, (err) => { if (err) { console.error("Error starting server:", err); process.exit(1); } console.log("Server listening on http://localhost:3001/mcp");});
Let’s break down the key parts:
resourceUri: The ui:// scheme tells hosts this is an MCP App resource.
The path structure is arbitrary.
registerAppTool: Registers a tool with the _meta.ui.resourceUri field.
When the host calls this tool, the UI is fetched and rendered, and the tool result is passed to it upon arrival.
registerAppResource: Serves the bundled HTML when the host requests the UI resource.
Express server: Exposes the MCP server over HTTP on port 3001.
// src/mcp-app.tsimport { App } from "@modelcontextprotocol/ext-apps";const serverTimeEl = document.getElementById("server-time")!;const getTimeBtn = document.getElementById("get-time-btn")!;const app = new App({ name: "Get Time App", version: "1.0.0" });// Establish communication with the hostapp.connect();// Handle the initial tool result pushed by the hostapp.ontoolresult = (result) => { const time = result.content?.find((c) => c.type === "text")?.text; serverTimeEl.textContent = time ?? "[ERROR]";};// Proactively call tools when users interact with the UIgetTimeBtn.addEventListener("click", async () => { const result = await app.callServerTool({ name: "get-time", arguments: {}, }); const time = result.content?.find((c) => c.type === "text")?.text; serverTimeEl.textContent = time ?? "[ERROR]";});
The key parts:
app.connect(): Establishes communication with the host. Call this once
when your app initializes.
app.ontoolresult: A callback that fires when the host pushes a tool
result to your app (e.g., when the tool is first called and the UI renders).
app.callServerTool(): Lets your app proactively call tools on the server.
Keep in mind that each call involves a round-trip to the server, so design your
UI to handle latency gracefully.
The App class provides additional methods for logging, opening URLs, and
updating the model’s context with structured data from your app. See the full
API documentation.
To test your MCP App, build the UI and start your local server:
npm run build && npm run serve
npm run build; npm run serve
In the default configuration, your server will be available at
http://localhost:3001/mcp. However, to see your app render, you need an MCP
host that supports MCP Apps. You have several options.
Claude (web) and Claude Desktop
support MCP Apps. For local development, you’ll need to expose your server to
the internet. You can run an MCP server locally and use tools like cloudflared
to tunnel traffic through.In a separate terminal, run:
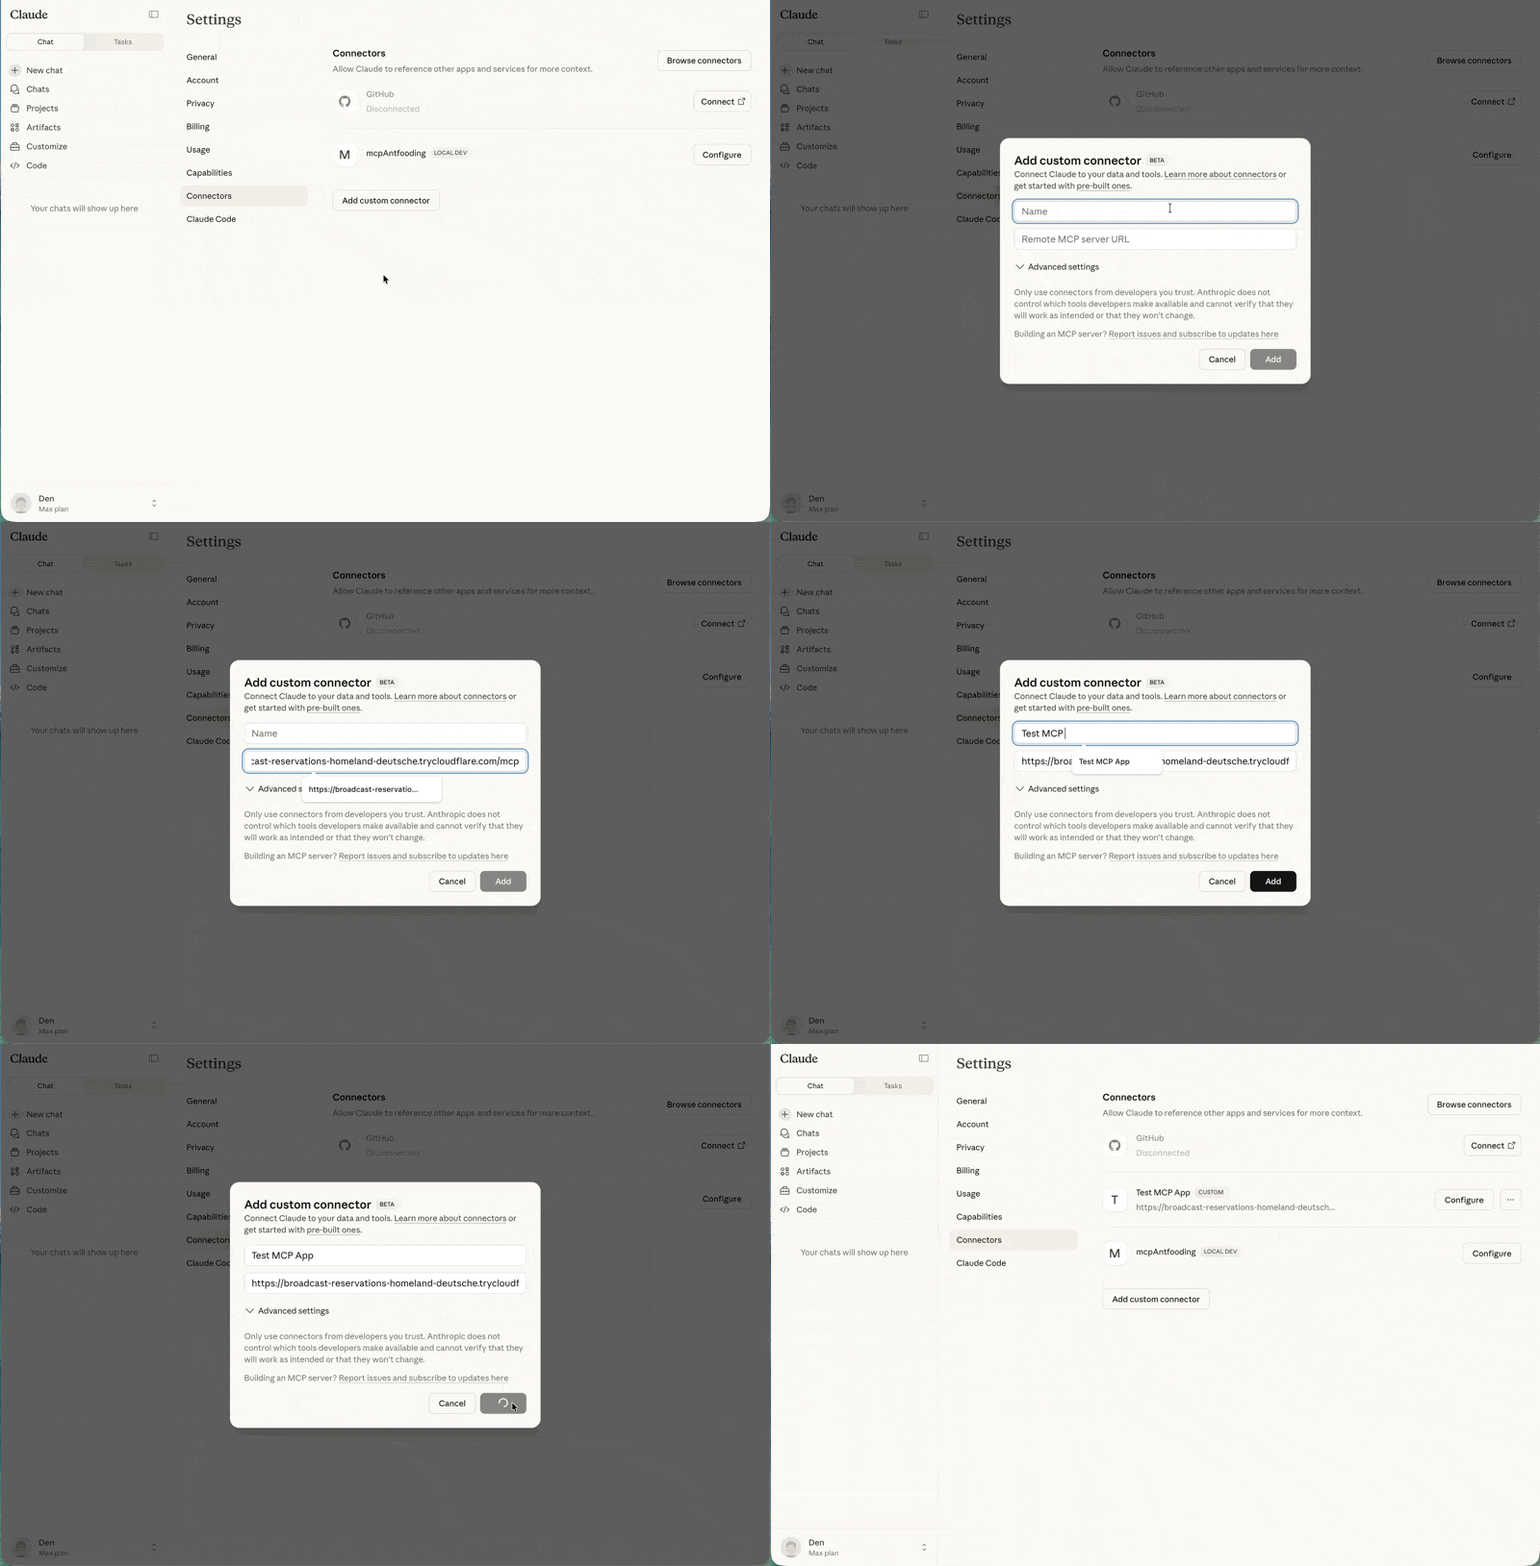
Copy the generated URL (e.g., https://random-name.trycloudflare.com) and add it
as a custom connector
in Claude - click on your profile, go to Settings, Connectors, and
finally Add custom connector.
Custom connectors are available on paid Claude plans (Pro, Max, or Team).
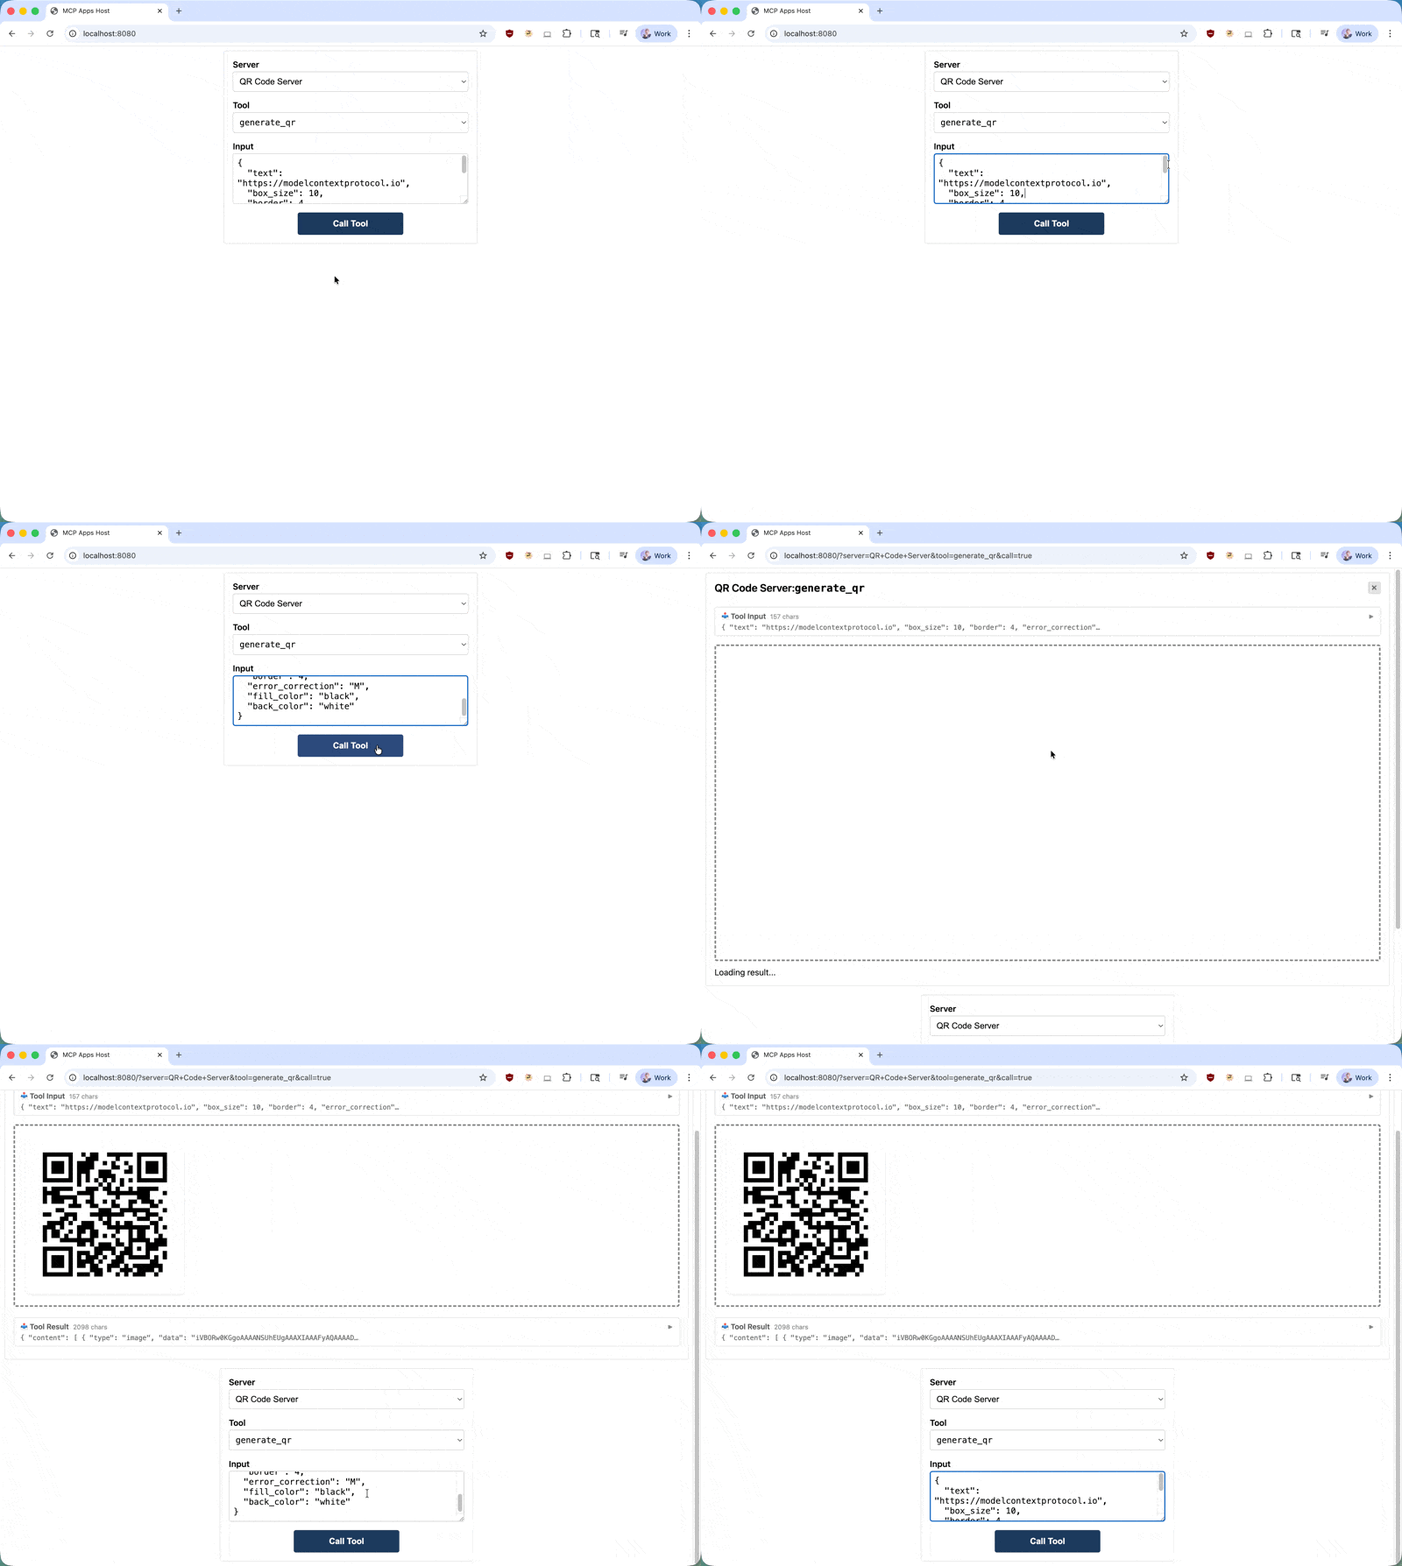
Running npm start from ext-apps/examples/basic-host/ will start the basic-host
test interface. To connect it to a specific server (e.g., one you’re developing),
pass the SERVERS environment variable inline:
Navigate to http://localhost:8080. You’ll see a simple interface where you can
select a tool and call it. When you call your tool, the host fetches the UI
resource and renders it in a sandboxed iframe. You can then interact with your
app and verify that tool calls work correctly.
MCP Apps is under active development. If you encounter issues or have ideas for
improvements, open an issue on the
GitHub repository.
For broader discussions about the extension’s direction, join the conversation
in GitHub Discussions.
Was this page helpful?
Assistant
Responses are generated using AI and may contain mistakes.